Category: Tech

  • how to use Patreoviewe: A Step-by-Step Guide

    how to use Patreoviewe: A Step-by-Step Guide

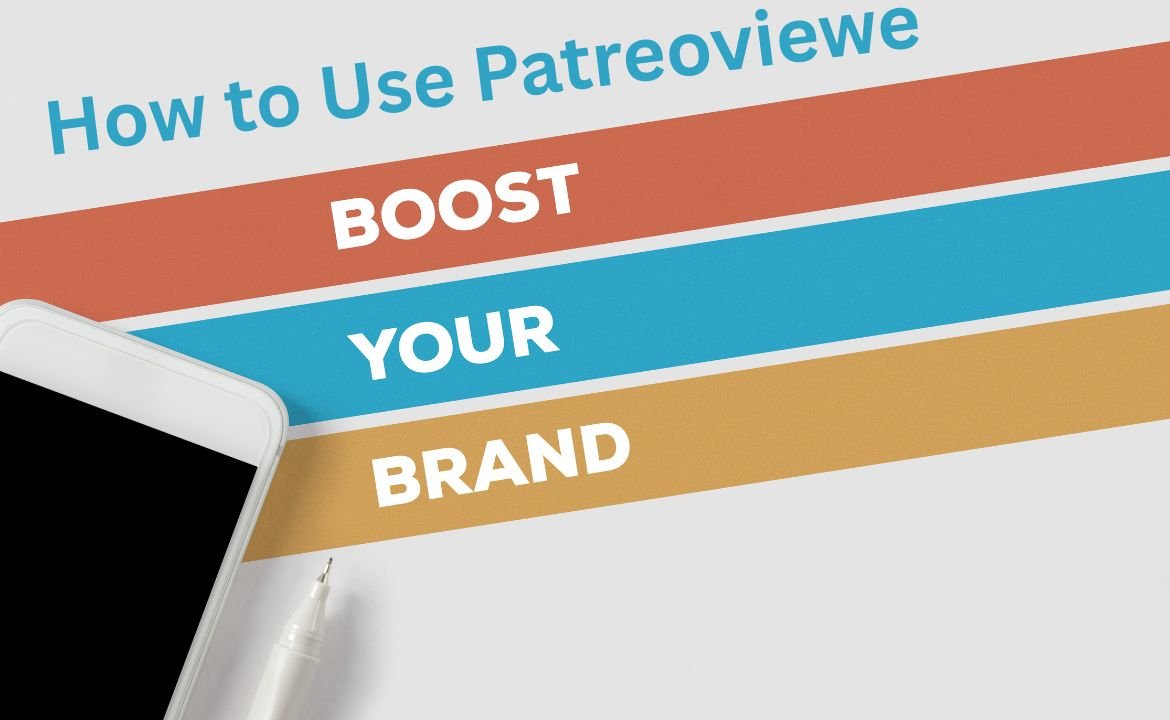
    Learning how to use Patreoviewe can make this dream a reality for many creators looking to monetize their passion. With its user-friendly interface and robust features, Patreoviewe is becoming an essential tool for connecting with audiences and driving revenue.

    This platform offers a unique way for creators to engage with their fans while generating revenue, making it increasingly relevant in today’s digital landscape.

    What is Patreoviewe?

    Patreoviewe is revolutionizing the way creators and their supporters interact, bridging the gap between traditional content sharing and personalized engagement. To Allow fans to pay for exclusive content while simultaneously enabling creators to showcase their work in unique formats, it fosters a vibrant community where both parties thrive. 

    For users looking to maximize their experience, engaging with creators through comments and feedback not only builds a sense of community but also helps guide future content creation. Additionally, leveraging social media to promote Patreoviewe pages can attract new subscribers and deepen existing relationships. 

    Why Use Patreoviewe?

    Diverse Monetization Options: Patreoviewe offers creators a range of monetization tools, allowing them to tailor their funding strategies. From subscription tiers to one-time donations, creators can engage their audience in multiple ways, maximizing revenue potential.

    Enhanced Community Engagement: To utilize Patreoviewe, creators can foster a deeper connection with their supporters. The platform encourages interaction through exclusive content, behind-the-scenes access, and personalized messages, transforming casual followers into loyal fans.

    Robust Analytics Tools: One of the standout features of Patreoviewe is its comprehensive analytics dashboard. Creators can track subscriber growth, engagement rates, and revenue streams in real-time, enabling data-driven decisions that refine content and marketing strategies. Tools like Patreoviewe—and others such as Tech Tools G15tooltech—are reshaping how creators approach digital engagement and income generation.

    Utilizing Patreoviewe not only streamlines the monetization process but also empowers creators to build a sustainable career around their passion. As the digital landscape evolves, platforms like Patreoviewe are essential for those looking to thrive while maintaining authentic connections with their audience.

    how to use Patreoviewe?

    1. Create an Account

    To begin using Patreoviewe:

    • Visit the official website and sign up using your email or social account.
    • Choose whether you’re a creator or a supporter.
    • Complete the account verification process.

    Once you’re registered, you’re ready to explore.

    2. Set Up Your Creator Profile

    Your profile is your brand’s face. Take time to optimize it:

    • Profile Picture: Use a professional image or your logo.
    • Bio: Include who you are, what you create, and why users should subscribe.
    • Cover Image: Choose something eye-catching and relevant to your content theme.

    This will help establish credibility and attract supporters.

    3. Define Your Membership Tiers

    One of the key features of Patreoviewe is the ability to create different subscription tiers. Here’s how to set them up:

    • Go to the Membership section
    • Click on Add Tier
    • Name your tier (e.g., Bronze, Silver, Gold)
    • Set pricing (e.g., $5, $10, $25 per month)
    • Describe the benefits of each tier

    Tips:

    • Keep lower tiers simple.
    • Offer behind-the-scenes content, Q&As, or early access in higher tiers.
    • Review competitor profiles for inspiration.

    4. Customize Your Content Strategy

    A solid strategy will help retain subscribers and attract new ones.

    Content Types You Can Share:

    • Blog posts
    • Exclusive videos
    • Downloadable resources (PDFs, guides)
    • Podcasts
    • Webinars or live sessions

    Use a content calendar to plan your posts. Stay consistent in quality and timing.

    5. Promote Your Patreoviewe Page

    Even the best content needs promotion. Here are ways to spread the word:

    Social Media

    • Share exclusive previews on Instagram, X (Twitter), and Facebook.
    • Use the Swipe Up feature for direct linking if available.

    Email Marketing

    • Include your Patreoviewe link in newsletters.
    • Send teaser content to entice subscribers.

    Collaborations

    • Partner with other creators for cross-promotion.
    • Feature guest posts or co-hosted events.

    6. Engage With Your Supporters

    Building a loyal community takes effort. Here’s how to stay connected:

    • Reply to comments regularly
    • Ask for feedback and suggestions
    • Host monthly Q&A sessions or live streams
    • Send personalized thank-you messages

    Supporters feel valued when creators take the time to interact.

    Tips to Optimize Your Use of Patreoviewe

    To optimize your use of Patreoviewe, start by customizing your content to cater to your audience’s preferences. Analyze engagement metrics to understand what resonates most and tailor future posts accordingly. 

    Incorporate interactive elements like polls and Q&A sessions to foster community involvement and keep your supporters engaged.

    Leverage exclusivity by offering behind-the-scenes content or early access to new projects. This not only enhances the value of your tiered memberships but also encourages patrons to feel more connected to your creative journey.

    how to use Patreoviewe

    Additionally, consider collaborating with other creators on the platform; this can introduce you to new audiences and invigorate your existing fanbase. Remember, consistency is key—regular updates keep your patrons invested and looking forward to your next move.

    How to Keep Subscribers Coming Back

    Creating a compelling subscriber experience hinges on personalized engagement. One effective strategy is to utilize tools like Patreoview to gain insights into your audience’s preferences. By analyzing subscriber interactions and feedback, you can tailor content that resonates deeply with their interests.

     For instance, consider creating exclusive behind-the-scenes content or personalized shout-outs that acknowledge long-time supporters, making them feel valued and connected to your journey.

    Additionally, fostering a community atmosphere can significantly enhance subscriber retention. Encourage interaction among subscribers through live Q&A sessions, polls, or discussion forums, allowing them to share ideas and feedback. 

    This not only strengthens their bond with your brand but also cultivates a sense of belonging. By consistently delivering high-value content while actively engaging with your audience, you create an inviting space that keeps them coming back for more. Remember, it’s not just about what you offer; it’s about how you make them feel in the process.

    Is Patreoviewe Safe and Secure?

    The platform employs encryption technologies to protect user data, which is a crucial factor in today’s digital landscape. Additionally, Patreoviewe offers various privacy settings, allowing users to control who can access their content. 

    This level of customization empowers creators to manage their audience effectively while safeguarding their intellectual property.

    However, like any online service, the safety of Patreoviewe also hinges on user behavior. It’s vital for users to understand how to use Patreoviewe responsibly, ensuring that they don’t share sensitive information in public forums or with untrusted individuals. Regularly updating passwords and enabling two-factor authentication can further enhance security measures.

    Final Thoughts: how to use Patreoviewe for Long-Term Success

    Learning how to use Patreoviewe isn’t just about signing up. It’s about understanding the platform’s potential for building a brand, community, and steady income. By customizing your tiers, posting regularly, and engaging authentically, you can turn your creative passion into a thriving digital venture.When used correctly, Patreoviewe becomes more than a platform—it becomes your business partner.

    Frequently Asked Questions

    Q1: Is Patreoviewe free to use?

    Yes, it’s free to sign up. However, the platform takes a small percentage of your monthly earnings depending on your plan (Starter, Pro, or Premium).

    Q2: Can I integrate Patreoviewe with other tools?

    Absolutely Patreoviewe supports integrations with Mailchimp,Discord,Zapier.YouTube and Vimeo

  • Why yr‑ws486rp‑gtr Making Noise

    Why yr‑ws486rp‑gtr Making Noise

    The hum of technology often goes unnoticed, yet the yr-ws486rp-gtr is making waves with its unexpected sounds. This device has piqued the interest of users and experts alike, raising questions about its functionality and purpose. Understanding Why yr‑ws486rp‑gtr Making Noise is crucial for anyone looking to optimize their experience with this gadget. 

    Understanding the Yr‑WS486RP‑GTR Unit

    The yr-WS486RP-GTR unit, much like other established brands such as Panasonic, Hisense, and Mitsubishi, is designed to provide efficient air conditioning and ventilation. However, when you start hearing unexpected noises, it can signal underlying issues that deserve immediate attention. These sounds often originate from various components, both inside and outside the unit.

    For instance, fan blades might create a whirring noise, while motor bearings could emit a grinding sound, indicating wear and tear. Outside, loose mounting brackets or improperly secured housing may rattle, adding to the overall disturbance.

    Addressing these noises is crucial for multiple reasons. Firstly, they can lead to significant irritation and distraction, disrupting your peace at home or in the workplace. Moreover, ignoring these sounds can result in long-term damage to the unit, which may escalate repair costs.

    By proactively identifying and resolving noise issues in the yr-WS486RP-GTR, you not only enhance its operational efficiency but also extend its lifespan. Ultimately, understanding Why yr‑ws486rp‑gtr Making Noise helps you maintain a comfortable environment while safeguarding your investment.

    Top 5 Causes of Noise

    1. Fan-related Issues

    Fan-related issues can be a significant source of noise, often stemming from neglected maintenance. When dust and debris accumulate on the blades, it can create an imbalance that leads to unwanted vibrations. These vibrations not only disrupt the peace in your space but can also signal that it’s time for a thorough cleaning or even a replacement.

    2. Motor or Bearing Wear

    Motor and bearing wear is a significant contributor to unwanted noise in machinery. As bearings age, they can develop imperfections that lead to increased friction and, ultimately, louder operation. 

    3. Compressor or Internal Vibration

    Why yr‑ws486rp‑gtr Making Noise

    The compressor cycles can create a pulsating or humming sound, which may become bothersome over time.Internal sensors that monitor temperature and pressure can trigger frequent cycling, resulting in intermittent noise that disrupts the peace of your environment.

    4. Airflow Problems

    Blocked air filters and ducts can lead to a cacophony of sounds, including rushing air, rattling noises, and high-pitched hums.The damper assemblies may produce a “clicking” or chattering sound as they open and close over time, contributing to the overall noise levels.

    5. Installation & Mounting

    Improper installation can significantly heighten noise levels, as vibrations from components resonate through unsteady mounts. Missing rubber gaskets or loose screws create unwanted rattling sounds, while equipment positioned too close to walls amplifies reflected noise, making the problem even worse.

    How to Diagnose the Noise

    When dealing with the perplexing issue of Why yr‑ws486rp‑gtr Making Noise, the first step is to identify the type of sound you’re hearing. A whirring or humming noise typically signals a fan or motor at work, while a squealing sound often points to worn bearings or a struggling compressor belt.

    Why yr‑ws486rp‑gtr Making Noise

    On the other hand, clanking or clicking noises may indicate loose parts or dampers in need of attention. By honing in on these distinctive sounds, you can narrow down the possible causes and take action.

    Solutions & Maintenance Tips

    Clean & Tighten

    Disconnecting the power to ensure safety, then carefully remove the casing. Use a soft brush to gently clean the fan blades, removing any dust buildup that could be causing excessive noise. check for loose screws on both the housing and fans; tightening these can significantly reduce vibrations and rattling sounds. Once everything is clean and secure, reassemble the unit and test it out. 

    Lubricate or Replace Bearings

    Start by lubricating the bearings or applying WD-40 or silicone oil to the motor shaft, which can often alleviate unwanted sounds and improve performance. If the noise persists, it may be time to consider replacing the bearings or even the entire fan motor for a long-term solution.

    Replace Damaged Components

    If you notice the unit making noise, it could be due to a bent fan blade or cracked ducts that disrupt airflow and cause vibrations. Replacing these parts not only eliminates unwanted sounds but also enhances the overall efficiency of your system.

    Check Mounting & Vibration Isolation

    Utilizing rubber or memory foam pads beneath the mounting bolts can significantly dampen vibrations and minimize sound transmission. Ensuring that the unit is level and not tightly pressed against walls allows for better airflow and reduces noise amplification.

    Service Compressor & Internal Parts

    As humming or pulsating from the compressor, it’s essential to call a technician for a thorough inspection. These sounds often indicate underlying issues with the compressor or its internal components, such as a failing Discharge Pulse Capacitor 7kV 0.2µF 200nF, which require professional attention to avoid further damage.

    Preventive Maintenance Checklist

    Regularly cleaning filters every 1–3 months is essential for optimal performance and air quality. Additionally, inspecting fan blades and housing on a quarterly basis can prevent potential issues before they escalate, ensuring your system operates smoothly. 

    When to Call a Professional

    If you notice your yr-ws486rp-gtr making noise even after performing basic cleaning and tightening, it’s a sign to seek professional help. Persistent sounds can indicate underlying issues that DIY methods won’t resolve. 

    Final Thoughts

    The yr‑ws486rp‑gtr making noise serves as a reminder of the complexities inherent in modern technology. By examining this noise, we can uncover critical insights that may enhance our overall experience with the product. It’s essential for users to recognize potential problems early on, as this can prevent further complications down the line.

    Additionally, sharing experiences related to this issue can lead to valuable discussions among peers and experts alike. Let’s engage in an ongoing conversation about Why yr‑ws486rp‑gtr Making Noise and work together towards finding effective solutions.

    FAQs

    What type of noise is the yr-ws486rp-gtr making?

    The yr-ws486rp-gtr may produce various sounds, including rattling, buzzing, or grinding, depending on the underlying issue.

    Is it normal for the yr-ws486rp-gtr to make noise during operation?

    Some noise is typical during operation, but loud or unusual sounds may indicate a problem that needs attention.

    What causes the yr-ws486rp-gtr to make a rattling sound?

    Rattling noises can often be caused by loose components or debris within the unit that may need to be secured or removed.

  • How to Delete Stickers on iPhone: A Step-by-Step Guide

    How to Delete Stickers on iPhone: A Step-by-Step Guide

    If you’re wondering how to delete stickers on iPhone, you’re not alone. Many users struggle with managing their sticker packs, which can slow down your device and overwhelm your messaging app Over time, sticker packs can accumulate and take up space or distract from important conversations.

    Why iPhone Stickers Need to Be Managed

    Managing iPhone stickers is essential for a seamless user experience, especially as these digital embellishments can quickly accumulate and clutter your messaging apps. When you think about it, each sticker represents a moment, an emotion, or a joke shared with friends, but over time, they can become overwhelming.

    By learning how to delete stickers on iPhone, you not only free up space but also streamline your communication style, making it easier to find your favorite stickers when you need them most.

    Additionally, an organized sticker collection enhances creativity in your conversations. Instead of scrolling through a sea of unused or forgotten stickers, a curated selection allows for quick access to the most relevant expressions and visuals. This not only improves the speed of your messaging but also elevates the overall aesthetic of your chats. 

    Types of Stickers on iPhone

    Before you delete stickers, understand the different sticker types available on iPhones:

    1. App-Based Stickers

    These come with apps installed from the App Store. Many iMessage apps include sticker features.

    2. Standalone Sticker Packs

    These are dedicated sticker-only apps available in the iMessage App Store.

    3. Custom or Memoji Stickers

    These include personalized stickers like Memoji or Bitmoji. They often sync with your Apple ID.

    Knowing the type helps determine how to delete them.

    How to Delete Stickers from the iMessage App Drawer

    The most common place people want to remove stickers is the iMessage drawer.

    Steps to Remove Stickers from the Drawer

    • Open your iMessage app and tap on the App Store icon next to the text input field. This reveals your app drawer filled with stickers, games, and other apps.  
    • To remove a sticker pack, swipe left across the app icons until you reach the sticker pack you want to delete. Tap and hold on the sticker pack icon until a pop-up menu appears.
    • Select “Remove” or “Delete,” depending on your device’s iOS version. Confirm your choice, and voilà—the sticker pack is gone!  
    How to delete stickers on iPhone
    • If you want to keep things tidy, consider organizing your favorite stickers into a separate folder by dragging them to the top of the app drawer.
    • Remember, deleting a sticker pack doesn’t erase your previously sent stickers; they’ll still appear in conversations. 
    • You can also go to the App Store to explore new sticker packs, ensuring your collection remains fresh and relevant to your current vibe.
    • Regularly curating your sticker selection can enhance your messaging experience, making conversations more engaging and personalized.

    How to Permanently Delete Sticker Apps

    If you want to completely remove sticker packs from your iPhone, deleting the app is the best method.

    Start by navigating to your device’s home screen and locate the sticker app you wish to delete.

    Long press on the app icon until a menu appears or the icons start to jiggle, depending on your iOS version. 

    Select “Remove App” from the menu options, then confirm by tapping “Delete App.” This action will not only uninstall the app but also remove any associated stickers stored on your iPhone.

    For a more thorough clean-up, head to Settings > General > iPhone Storage. Here, you can find a list of all installed apps, including sticker apps, and ensure that all data related to them is removed. 

    Don’t forget to check your messaging apps for any lingering stickers. 

    Finally, consider organizing your app layout post-deletion. By grouping similar apps together or creating folders, you can streamline access to your favorite tools while keeping unwanted stickers out of sight.
    In the end, taking these steps not only clears your device but also promotes a more mindful digital presence.

    How to Delete Memoji Stickers

    Memoji stickers are automatically created when you set up Memoji or Animoji. Though you can’t completely delete them, you can disable them from appearing.

    • To delete a specific Memoji sticker, press and hold the sticker you want to remove. A menu will pop up, giving you options like “Delete” or “Remove from Favorites.”
    • If you wish to delete multiple stickers at once, navigate to the “Sticker” section in your iMessage apps, select “Edit,” and check off the Memojis you want to get rid of before confirming the deletion.
    • For those looking to clean up their entire Memoji collection, head to your Settings app, scroll down to “Messages,” and tap on “Sticker Packs.” From there, you can manage and delete unwanted stickers effectively.
    • Remember, deleting a Memoji sticker does not erase the Memoji itself; it simply removes it from your sticker collection. You can always recreate or modify your Memojis later if needed.

    How to Delete Stickers Sent in a Conversation

    Although you can’t always remove sent stickers for both users, you can delete them from your own screen.

    Remove a Sent Sticker (from Your Device Only)

    1. Open the conversation in iMessage.
    2. Tap and hold the sticker you want to remove.
    3. Select More…
    4. Tap the trash icon to delete it from your view.

    Alternative Ways to Clean Up Stickers

    Apart from the usual delete methods, you can try these advanced steps:

    Offload Unused Apps

    If you’re looking to declutter your iPhone and remove those pesky sticker packs cluttering your Messages app, offloading unused apps is a smart strategy. By taking a moment to assess which apps you rarely use, you can not only free up storage space but also eliminate the associated sticker sets that often come along for the ride. 

    Offloading an app keeps its data intact while removing the app itself, giving you the flexibility to reinstall it later without losing any of your previous settings or content.

    Offload Unused Apps

    To get started on how to delete stickers on iPhone effectively, navigate to your Settings app and head to General > iPhone Storage. Here, you’ll find a comprehensive list of apps ranked by storage usage. 

    Identify the ones that you haven’t opened in a while—these are prime candidates for offloading. Once offloaded, the stickers linked to those apps will vanish from your Messages, creating a cleaner and more streamlined experience. 

    This simple yet effective process not only refreshes your device but also enhances your messaging interface, making it easier to find and use the stickers you truly love.

    Delete via App Store

    Many users aren’t aware that sticker packs often come bundled with messaging apps, and deleting them directly from the store can streamline your collection. Simply open the App Store, tap on your profile picture, and scroll down to the “Purchased” section. 

    Here, you’ll find all the sticker packs you’ve ever downloaded. With just a swipe left, you can remove any unwanted stickers and free up some digital space on your device.

    Another benefit of this approach is that it allows you to curate your sticker library based on your current preferences without diving into each individual messaging app. This not only declutters your iPhone but also enhances your messaging experience by keeping your most-used stickers at your fingertips. 

    So next time you’re wondering how to delete stickers on iPhone, remember that the App Store holds the key to a cleaner, more organized digital communication tool.

    Final Thoughts on How to Delete Stickers on iPhone

    Knowing how to delete stickers on iPhone helps improve performance and user experience. Whether you’re looking to clear out your iMessage drawer, remove unused apps, or simply reduce distractions, these steps are simple and effective.

    FAQs

    Can I recover deleted sticker packs?

    Yes, go to the App Store > Purchased and reinstall them.

    Why can’t I delete some sticker apps?

    They may be built into apps like Facebook or WhatsApp. You’ll need to delete the parent app.